MT WASHINGTON HIKE RECAP & DATE ANNOUNCEMENT
ROBERT BAILEY
This year we will be hiking the mountain on JUNE 10TH, beginning at 7AM! We encourage you are all your friends to join us.
MT. WASHINGTON
New Hampshire’s, Mt. Washington (6,288 feet) is the highest peak east of the Mississippi River and North of the Carolinas. While that may not seem like much of a mountain for people that live in Colorado, Utah or Montana, where peaks are usually double that in height. But what Mount Washington lacks in pure height, it more than makes up for with fierce winds and temperatures that dip well into negative territory on a regular basis. Known for having a reputation of being “home of the world’s worst weather,” it most notorious for its harsh and unpredictable weather and record setting wind gusts for the fastest gust ever recorded on the surface of Earth at 231mph for most of the 20th century. It is crucial that you come to this mountain prepared for weather extremes even in the summer. Incredibly strong wind gusts are still very common, especially around the ridge of the ravine, and temperatures can drop into the 20s and below. You will need to pack layers and be prepared for completely opposite weather from base to summit. It can be sometimes a 40 degree difference.There are numerous trails leading to the summit. All with different lengths, different difficulties, and different points of views of the White Mountains. So I am going to cover and compare the 2 trails that we actually hiked which are Lion’s Head and Tuckerman’s Ravine. Maybe we will try a different one this year!
PARKING:
Pinkham Notch Visitor Center
The visitor center is great place to park. Pinkham Notch is the starting point for numerous trailheads. Before our hikes we take full advantage of the full breakfast, bathroom and shower facilities, and gift shop. After our hike we usually use the showers, BUT bring lots of quarters, because they run on quarters. I forget the breakdown of quarters per minute, but I think I used at least $5 in quarters. lol
The first year we climbed Mt. Washington, we ended up and had to take Lion’s Head, because part of Tuckerman’s Ravine trail was closed due to the fact that the ravine was still buried in snow. The Lion Head Trail is a variation of the Tuckerman Ravine route that avoids climbing the actual ravine by climbing the Lion Head, a knob on the ravine's north rim which offers excellent views and just around the same distance at 4.2 miles. Begin on the Tuckerman Ravine Trail at Pinkham Notch. About 1.5 miles in you will reach the junction with the Lion Head Route and soon after that, about 1/4 mile, enters the steepest portion of the trail that will climb up to tree line, gaining approximately 1,000 feet in a half-mile. While it is still hiking, the majority of Lion Head Trail is pure scrambling and some bouldering. There are two or three rock faces that will require you to have three points of contact with the rock, and you need to be able to pull yourself up. There was also a section that I remember where there was a rope involved and you had to pull yourself up using the rope.After you reach the tree line, follow the well-cairned path to Lion Head and across the most exposed portion of the trail, which can often be the windiest section. Once reach the base of the summit cone and the trail turns into big boulders and lots of rock hopping and some scrambling. Make sure to follow the cairns they will keep you in right general direction to the summit. So while Lion’s head may be the steeper trail and maybe not recommend for a beginner or someone out of cardio shape, it boasts some of the best views of the White Mountains. But be prepared to work hard for those views!!
Elevation gain: 4,300ft
Difficulty: Strenous
Approx time: average 3-4 hr
Tuckerman’s Ravine is one of the shortest, dare I say slightly easier route, but also most popular, heavily trafficked trails to the summit, but offers some of the best views. Between the Tuckerman and Lion head, this would probably be the easier of the two trails, but by no means is this a walk in the park. The trail begins behind Pinkham Notch Visitor center It’s 4.1 miles to the summit and observatory. The first 2 or so miles are a mild, gradual hike through the woods on a wide rocky path that passes over Cutler river, over couple bridges and takes you by the picture worthy Crystal Cascade. Almost 2.5 miles in you will reach Hermit Lake Shelter which is the only legal campsite on Mt. Washington and you need to purchase a permit at Pinkham Notch Visitor Center if you plan to stay there. Also a great place to have a snack and fill up your water if need be. Once you hit the Tuckerman Ravine headwall the hike turns into a steep rock staircase. Make sure to turn around ever so often and take in the amazing views from here (and also a great excuse to catch your breathe). Once you get to the top of the ravine, the staircase of rocks turns more into large boulder hopping. This last section, up the summit cone of Mt. Washington, is another steep ascent over large rocks, more "rock-hopping" than trail walking. Make sure to follow the cairns. Always keep them in sight and do not venture to far from them, unless you want to make your trip a little longer. While this trail is a moderate but relentless climb, its probably the best option for any beginner hiker with goals of hiking Mt. Washington. And while some people would rather avoid the crowds, its good to know there are people there that can help you.
Distance: 4.1 mi
Elevation gain: 4,200ft
Difficulty: Strenuous
Approx time: average 3-4 hr
WHAT IS AT THE TOP??
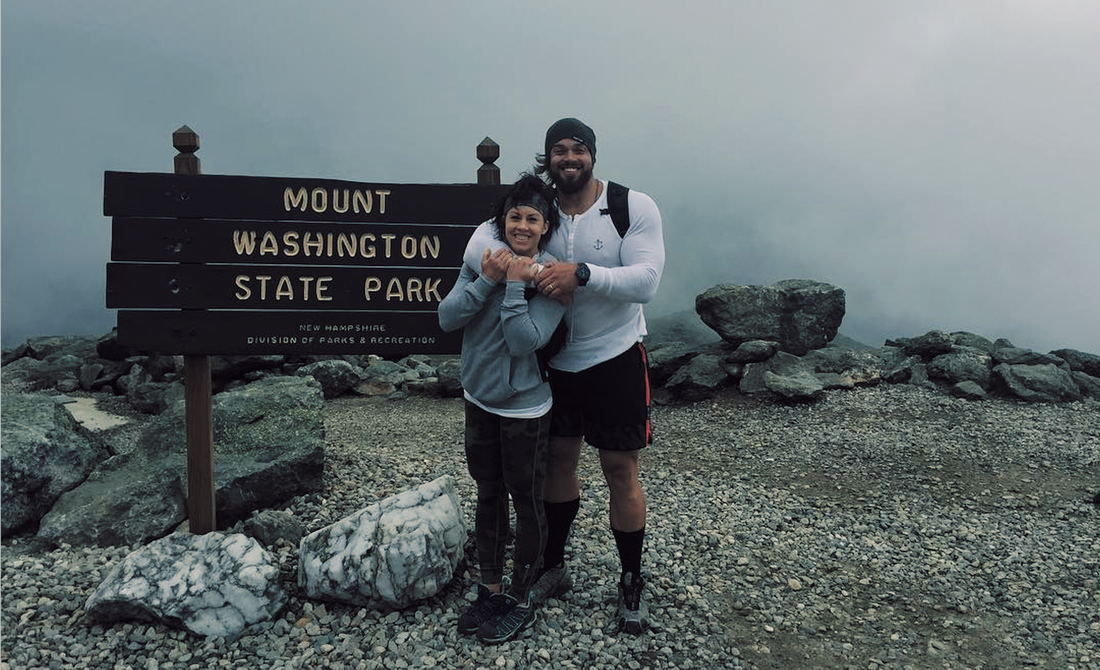
The official trail actually ends with a cairn and a sign just below the Auto Road. You then have a huge set of steep stairs that you have to climb, which seems like a cruel joke, which then leads you to Crawford Path. Follow Crawford Path to reach the OFFICIAL SUMMIT with a sign that you obviously need to take a picture, because #pictureoritdidnothappen, and of course there is always a line to take a picture with the sign. At least you can stand in it and catch your breathe before the picture. After your picture, you will find a couple attractions to occupy yourself while you rest up for the descent or wait for your shuttle bus down. Yes there is also a shuttle bus option to take you down the back side. At the top of Mt. Washington is the Weather Observatory Station and its museum; the Cog Railway, which I have no been on yet, so I do not have much info about that; the Tip-Top House, which was once a hotel and now just featured as an exhibit to walk through; and best part yet, the Visitor Center, which has bathrooms, a gift shop, a cafeteria with variety of food and drink options and hot food, this is also where you buy your shuttle bus pass if you opt out of hiking back down.

Because the weather is so unpredictable, you should be prepared for everything! The weather at the base is nothing like the weather at the summit. The temperature difference between base and summit is often in excess of 40 degrees. It might be 75 and sunny at the base and has you thinking, hmmm maybe I packed to much. Before you run to the car and take some layers off, keep all of them!!! You should have some sort of hiking pack with you, like our new day hiker bag, the JOY, to carry your extra layers, because you will need them at the top. Storms can roll in fast so its good to be prepared for all weather and even some snow can occur really at any point and time of the year.
PACK LIST:
- Light weight, day hiking bag - The JOY
- Appropriate hiking shoes - with grip for rocky terrain. I like Saloman trail runners
- Water - using our JOY BAG (carries 1.5 liters)
- Extra clothes: thermal, sweathshirt, gloves, hat, extra socks and rain gear (even on good days) the weather changes fast
- Headbands: because it get so windy you don't want your hair in your face as you are climbing rocks. So girls, or guys like rob with long hair, especially when you are climbing rocks you want to make sure its out of your face for safety.
- Camera or phone for pictures - picture at the top or it never happen!
- A good ol' fashioned trail map - the service is spotty and GPS has been known to fail here. You shouldn’t really need it, the trails are marked very well most of the way. until you get to the top you have to follow the rock piles.
- Snacks - for energy on the way up. Bars and trail mix are always great option to fuel your hike.
- Tissues. The wind can really whip and make your eyes water. Also my nose was so runny as we got closer to the top because it was so cold. OR just use your sleeve…I wont judge.
- Hiking poles (optional) - I see alot of people using them . I do not, but if you have bad knees they could be helpful
- Trailhead - the place where the trail begins.
- Cairns - A pile of rocks, wood or both used to mark a route or route junction.
- Free Climb - To climb using only one's hands and feet without artificial aids. A belay rope may be employed.
- Headwall - The upper section of a mountain where the terrain is set off from the terrain below by being more steep.
- Switchbacks - to zigzag up the side of the mountain instead of going straight up. If you are on a trail with switchbacks, stay on the trail.
- Summit Cone - last portion up to the top
Mt. Washington 2015
Mt. Washington 2016